
Showing posts with label kitchen. Show all posts

July 21, 2022

Taking The Wayback Machine To 1927...

Two days ago, I was sorting through my still-boxed cookbooks in search of an old favorite that contains a favorite "no bake" recipe for dinners. It's called "No Time To Cook" and I think it was a Better Homes and Gardens publication (or something like that). I did ultimately locate it, and used one of the recipes for dinner that evening. Thanks to a regular breeze here, it was actually quite comfortable after the sun went down, but I still didn't have any plans to light up the oven.

As I was searching for that cookbook, I came across more "antique" cookbooks that belonged to various ancestors. This one belonged to my dear mother-in-law, Evelyn. I decided to bring it upstairs and look through it. She even wrote a recipe of her own on the last page, and I'm definitely going to make that one. 

As you can see from the front page, this is a compilation of recipes from the Royal Baking Powder Company™, and the copyright is 1927! I love old cookbooks, and couldn't wait to dig into it. I'm not quite sure why I hadn't done it before in all these years.


This is the Index of all the recipes in this 100 page book. You may want to pull this image onto your desktop or into your images files so you can read it better or print it out. I'm suggesting that for a reason I'll explain by the end of this post. Don't forget you can also click on the image here to enlarge it.

Just look at all those recipes! I've already chosen the first on my list to make, which is the recipe for Luncheon Rolls that can be made from start to finish in about an hour! Those homemakers didn't have all day to waste in the kitchen. They had to clean house, get the kids to school, prepare a hot meal for the family, and they had to do it dressed up and wearing makeup! (Right?)

So, check out these recipes and I'll tell you why soon.

As I was telling my sister, Di about this discovery, she did an Amazon search for Royal Baking Powder.™ Can you believe they still make it?! Yes. It's made by the same company that makes the Clabber Girl™ brand. I use Clabber Girl™, but placed an order for the Royal brand which will be here tomorrow. I'm curious to see if there's a difference.

I love the photographs with step-by-step technique instructions, and there's even a page on how to cut the shapes into the ends of piping bags to make all the different decorating shapes with icing. Homemakers didn't keep a drawer-full of metal decorating tips in their kitchens. Haven't we become spoiled?
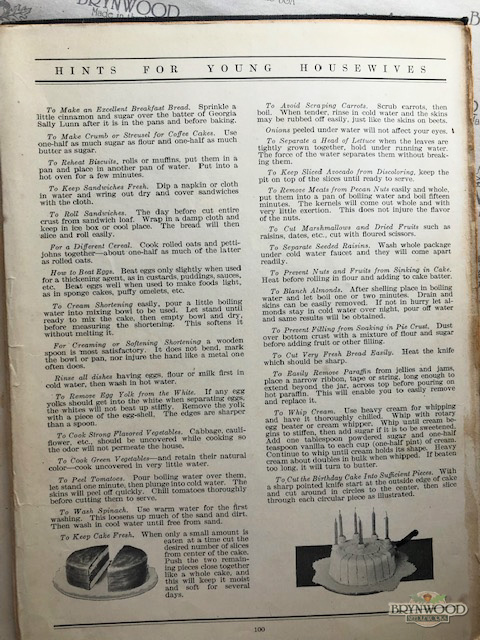

The book is also filled with many other pages of helpful hints, but mostly there are some wonderfully intriguing recipes. That's when the idea hit me. Have you heard of the movie where a young woman decided to make every one of Julie Child's recipes? Why can't this more mature bird attempt the same? Perhaps not every recipe, but I could take a good run at more than a few, and then share those recipes with you!

You'll be able to print out the recipes, and perhaps put them into your own binder to keep and share. So, what do you think? Do you like this idea? My first attempt will be those Luncheon Rolls. It says they're perfect for sandwiches, and who knows? They may become our go-to for sub sandwiches for family gatherings?

I'm already putting sticky notes all over this cookbook and trying to decide which recipes I'll make (maybe once every two weeks), and I'm going to give you a chance to have input on the choices. That's why I want you to enlarge, print out, or save the Index above. Let me know which recipe(s) you'd like to see me make and share. I may even do videos  to go with them, or live episodes from time to time. I'll keep track of all your suggestions, and will keep doing this at least until your suggestions run out. I may even have little prize drawings along the way!

So, that's what I'm going to do. Beginning Monday, August 1st, I'm going to make and post the first of many recipes from this cookbook. I'll share photographs of my creations, tell you how they worked up, how they tasted (I'm sure Handsome will help with that part), and then share the actual recipe with you. Then, you can try the recipes in your kitchen if you like. I'll make a new tab in the menu bar so you'll be able to find all the recipe posts in one place, too!

I'm looking forward to some awesome feedback, so please don't let me down. I'm excited about this project, and hope you will be, too.

June 30, 2020

It's Getting Colorful Now...

Brynwood Needleworks - Farmhouse Hollyhocks
 
I figured it would only take a few more warm days for the hollyhock buds to start opening. I guess yesterday was the day!
 
Brynwood Needleworks - Four Shades of Hollyhocks

There are at least four different colors in the garden...creamy yellow, light pink, dark pink, and magenta.

Brynwood Needleworks - Hummingird at Feeders

They're opening right next to the hummingbird feeders, and the hummers have noticed, too!
 
Brynwood Needleworks - Beautiful and Colorful
 
I've been asked for my secrets to growing these beauties. My answer is...I have no secrets. They thrive in spite of me. I planted five original plants right along the foundation. They're well-drained, and sheltered in a southern exposure. I did plant lavender, chives, and peppermint at the feet of my hollyhocks, so they may contribute to the bugs leaving them alone, but I'm not sure about that. I'm going to say that I think 75% of my success with the hollyhocks is just dumb luck...but I'm really grateful.

This corner of my life - right outside our door - hollyhocks that are nearly six feet tall, lavender, English daisies, Shasta daisies (for Mom), a lone delphinium (I must rectify that by getting more), and bee balm. I'm going to add more plants in the open spaces to appeal to the hummingbirds, honey bees, and butterflies. It only gets better from here.
 
DonnaAcornSignature

June 29, 2020

Weeding My Garden...

Brynwood Needleworks - June 28, 2020 Kitchen Garden
 
By the time we returned from our trip, the weeds were threatening to overtake my kitchen garden. I couldn't delay. I needed to get outside and pull the offenders. Weeding my garden also helps me clear my head. I think that's a good thing, right?
 
I went out while it was still cool on the southern exposure of the farmhouse, but by the time I was finished, I'd managed to burn the back of my neck. I had a lot of work to do! The good news is that I pulled all the weeds out, and really tidied up the kitchen garden bed.
 
I'd like to direct your attention to the hollyhocks. Remember when I planted the first five plants along the wall? Well, everything you see (ready to burst with color any day now), was all self-planted by the hollyhocks themselves. I'll take better pictures later in the week, but the deep pink/red, pastel pink and ivory ones have already started to open up.
 
Mom's daisies are opening, the lavender is in full bloom, and even the lone delphinium is joining in the concert of color. (I need to get more of those!)
 
I also cleaned up across the walkway, so the geraniums are visible again. Later this week, I'll get into the beds around the new porch and groom those, too. I'm going to add more plants in there - perhaps a few small bushes, so I'll be working in the early morning to beat the mid-day heat. I'm not complaining about it one bit, but I inherited my father's propensity to...ahem...perspire, so cooler and earlier works better for me.
 
My brother-in-law is coming to visit for a couple of days, so I'm sure Tag can handle his own post tomorrow. Lord knows what he's got planned, but I suspect he'll complain about not being an "only dog". You never know with that guy!
 
See you again Wednesday! Stay safe and enjoy the week. Remember, we're all in this together. xo

DonnaAcornSignature

September 11, 2018

Tuesdays With Tag - Moochin' In The Kitchen...

Farmhouse Pears

Hi, Everybody!

I'm here. You just can't see me yet.
I spent most of my day in our kitchen...hopin' for a tiny morsel of Hickory Hill Farm goodness.
Mom was cannin' pears that were picked right here at the farm!

Me, Waitin' For Farmhouse Pears!

See? I wasn't lyin'. Here I am, my gaze mesmerized by the sight of Mom cuttin' pears. Maybe if I look long enough, she'll lose her concentration and drop one of 'em. Of course, if that happens, I'll have to be ready, because you-know-who is pretty fast, too. She's still behind me, right? Sheesh. Can't a guy get a little breathin' room for his kitchen time? She's like a shadow, I tell ya.

Mom started her cuttin' in the mornin' and she was finished cannin' two batches (5 pint jars each batch) by my dinnertime (Boo and I eat earlier than Mom and Dad), so it was pretty close to 5:00 when she was done.

Ten Pints of Canned Pears
 
Aren't they pretty? Bella and I actually got to test the pears (just a teeny, tiny piece) before Mom put them in the pot with the light syrup she'd made. Don't worry. Mom is fanatic about washin' her hands, which she did before gettin' back to cuttin'. She said these are gonna be really tasty about mid-winter. I think she's right!

She's got more of the pears to cut and can, but she said her hands were a little sore by the time these were done, so she was gonna knock off for the day. I don't blame her. When my paws hurt, all I want to do is lie around on my back with my feet in the air. Can you even imagine Mom doin' that? Nope. I can't either! 

I'd hang around and chat, but really. If Mom is gonna go sit down for a bit with a cup of tea, she's probably gonna have a biscuit handy. (And, I love biscuits, too!!)
 
Now that I'm done moochin' in the kitchen (for now), I'm gonna follow her for a little moochin' in the livin' room! There she goes! Gotta run!
 
I'll see you again in seven. 'til then...  
"Chase A Dream - Or A Squirrel".
 

March 12, 2018

A Little Spring In The Kitchen...

Vintage Kitchen Cabinet

I'm sharing my latest farmhouse find with you today. (I really have to resist my daily forays into the Facebook Marketplace!) This is a beautiful, updated, vintage cabinet I found and brought back to Hickory Hill.

Vintage Farmhouse Cabinet
 
There are four drawers (the bottom one is a metal-lined bread drawer!), and a cupboard section with a vintage rack on the inside of the door. The whole piece measures 42" wide by 24" deep by 30" high, and the top is enameled metal. 
 
It's the perfect spot for our bread machine and toaster. I placed our smaller cutting boards in the rack on the door, and the larger ones in the drawer above it. Of course, the homemade (and store bought) breads and rolls will go into the bottom drawer. The large storage area behind the door is just the right size for my electric water bath canner, too! (You just never know when I'll have the urge to can something these days! lol)

I love the enamel top and the fabulous robin's egg blue paint color. Everything about it makes me smile, and now I have a lovely touch of Spring in the kitchen, too.

DonnaAcornSignature

July 7, 2015

Kitchen Storage Ideas...

Not long ago, I posted a few home photos with you. One of my readers noticed my rolling pins on the back wall of the kitchen and asked about how I mounted them to the wall, so I thought I'd share a few of my organization tricks with you today.
The rolling pins are family favorites. I purchased the top one, which we use when we make our Friday date night pizzas. The other two belonged to my mother-in-law.

I use them quite often, so it's handier to keep them out in the open. Plus, I love looking at them. Hanging them on the wall seemed to be the best option for me.
I went to one of the home improvement stores (I can't remember if it was Home Depot or Lowes), and found just the hardware that would work. The knobs on the ends are perfect for keeping the rolling pins from falling off them, and they look good, too.

For just a few dollars, I ended up with a great storage solution for my treasured - and much used - rolling pins.
I don't think I shared pictures of my pantry before, but in this partial photo, you can see my storage solution for all my spices.
This was my own idea for a do-it-yourself project that I'm really glad I made. I wanted to have all of my spices organized, but easily accessible. Stowing them away in drawers or a cabinet doesn't work for me.
Like many of you, I really like going to Bed, Bath and Beyond. I just knew that if I went on a hunt over there, I'd find what I needed to make my own spice racks. I measured two of the spice bottles (two different manufacturers) I found these bamboo drawer organizers that would be the right size.

I'd purchased one rack to take home and figure out how many more I would need. When you look at the pictures, you can see that I settled on ten of them, even though a couple more might have been in order.
I measured my available wall space in the pantry, did a little calculating and then grabbed my bottle of Gorilla Glue™. I had enough space on each section of wall for five drawer organizers, so that's how many I glued together.
After I busied myself long enough for the glue to set, it was time to attach them to the wall. I screwed through the back of the top and bottom sections, and then put one more set of screws in the center section. That way I could be sure they wouldn't pull apart when the jars were in place.

I even had enough room between the top of the rack and the bulkhead for a few more small bottles. Yes. They're all arranged alphabetically, according to manufacturer. It's not so crazy. How else can I quickly find what I need?

We'll be leaving these behind when we move. Believe me, they're well-secured to the wall here, so I'll make new sets after we settle into our next home.
We have another showing today (traffic is picking up!), so I won't be back in the studio until this afternoon. I have a few projects on the work table, which I'll show you tomorrow.

I do have one nice, little story to recount before I go. At our last showing, our realtor was asked if we'd paid to have a professional stager come in to prepare to show our home. She told them that the home "was staged by owner's wife". Short of an actual offer to purchase, this was one of the highest compliments I could have received for all our hard work. Wasn't that nice?

Happy Hump Day!
(Tag still loves that commercial. lol)
DonnaAcornSignature

October 24, 2013

 I managed to get quite a bit accomplished yesterday. I said I had "chores"
and I wasn't kidding. After dusting and running the vacuum cleaner, I
decided to do a little tidying up in the kitchen for good measure.

A few days ago, I needed my pie dish to try a new recipe. I remembered
that I have this wonderful dish with - of course! - acorns adorning it.
 It's been sitting on the counter since after dinner cleanup that night. I just
hated the thought of putting it back in the cupboard where it wouldn't
 be seen. I thought about it for a while and came up with a perfect solution.
 I decided to pretty up the space above our range. Nothing fancy.
Just a nice warm touch of wood in place of a bare, white wall.
 Now, I'll be able to look at my acorn pie plate every time I prepare
something tasty for our family. The added bonus is a little touch of autumn 
decor as we move into our own version of cool weather here in south
Florida. It might get all the way down to 60º overnight. I'm a happy girl.

What do you do to celebrate the seasons? I'd love to know.
DonnaAcornSignature

April 19, 2011

I'm On A (Sausage) Roll...

I decided to share my ridiculously simple recipe for sausage rolls with you today. Now, pay close attention because you don't want to miss a single step!

You won't even need a pencil for this, so no need to worry about writing anything down or printing out a long recipe. These are the ingredients: Pillsbury Crescent Rolls (8 per package) - or a package of Pepperidge Farm Puff Pastry (cut into strips), and frozen Brown & Serve Breakfast Sausages. In addition, you'll need cookie sheets and a serving dish. I also use parchment paper on the cookie sheets. (Who wants to have to do dishes, too? Not I!)
Because I was making sausage rolls for a large group of people, I decided to cut each frozen breakfast sausage in half. (**Do not thaw the breakfast sausages prior to prepping them for the rolls.) Unroll one package of eight crescent rolls. I cut the rolls, ignoring the perforations, so that I used the rolls proportionate to the size of the cut sausages.
Line the assembled, uncooked rolls on a cookie sheet...

...and then pop them into a preheated 400º F. oven for about ten minutes or until golden.
See? I told you. Ridiculously simple.

I came home with an empty serving dish from the guild meeting. Always nice when your hard work and hours spent in the kitchen are rewarded with an empty dish by an appreciative (and hungry) audience. (now I'm really giggling!)

You can serve these with mustard or another sauce of your choice if you want to be really fancy. I usually serve them plain. That suits us just fine.

These were the potholders that I assembled yesterday. At last month's guild meeting, they had a UFO (unfinished objects) sale. I purchased a whole bagful of (52) assembled quilt squares (for only $15.00!). I'm going to turn most of them into a quilt, but had these two left over.

I have to give guild member, Ann, credit for the beautiful block assemblies. All I did was layer the blocks with Insulbrite batting (especially for use in hot - oven - applications) along with a layer of regular batting and a piece of backing fabric. Then, I ran stitching around the inside of each element of the block to quilt all the layers together. The final step was to finish by sewing on the binding and a hanging loop.

I handed them in last night, so there will be one more pair of potholders for sale in the guild boutique at this year's quilt show. I found my pattern for the table mat yesterday (the one I put up for "safekeeping", and then couldn't find!), so I'll be making table mats and aprons to take with me next month to hand in.

I'll share updated Marie J quilt photos tomorrow. See you then!

July 4, 2010

Rain Didn't Dampen Our Weekend...

I hope everyone spent their weekend doing something they enjoy.
I spent some time in the kitchen, preparing an indoor cookout
to feed Handsome and some of our musician friends and their
spouses. They had two concerts Sunday morning, a break and
then a final concert last night. I served up dinner during the
break (in all honesty, it was a four hour break).

I decided on an indoor cookout - because it
rained cats and dogs all weekend. Really? Really!
Fireworks were held anyway.
Families gathered anyway.
Parades were marched and enjoyed anyway.
Patriotic concerts were held outdoors anyway.
It was only natural that I would cook on the grill during the
morning concerts, and have grilled food and all the fixin's ready
for our guests when they arrived. It really worked out well.

Handsome just recounted his musical weekend by reminding
me that he played four concerts, in three cities, over twenty four
hours (including the outdoor concert in the rain Saturday night),
and drove nearly 350 miles in that same time frame.
No wonder he was tired by the end of the day Sunday!
A photo from one of Maggie's blog posts.
I'd like to ask you to say a healing prayer for my friend,
Maggie at Just Between Me and You.
She was seriously injured at work a while back and cracked
two vertebrae. She celebrated Independence Day by tying a flag
to her cat, Tinkerbell's, tail and watching her parade around
the house! In spite of her ongoing and constant pain, she manages
to find humor in her life. I admire her immensely.
So, if you get a chance, a prayer, or perhaps a visit to leave a
comment on her blog would help her feel a little better.
Don't forget about my 400th Follower Post giveaway.
You can enter - and share with your blog pals - up to July 14th.

Until tomorrow, my friends...

October 15, 2009

Kitchen Makeover And A New Boutique Offering...

I kept my word today. I started by taking a short road trip to a nearby quilt shop to drop off two of my quilt tops. Garden Magic and Cotton Candy are now out for machine quilting and should be back so I can bind them by the end of November. I think the hardest part is always waiting for them to come back!
When I got back home, I proceeded to tear the kitchen apart. Handsome helped me empty the shelves and then refresh buckets of hot water and cleaner while I scrubbed them. I'm ashamed to say I hadn't cleaned the tops of those cabinets in a while and they really needed it! I dare say you could eat off them now.

In the mosaic above, the first two images are "before" pictures. The rest are a progression as I emptied, cleaned and re-staged the kitchen. You can click on the mosaic and it will take you to my Flickr album where you can see enlarged photos.

Please let me know what you think now that I'm finished. Well, almost finished. I looked at the "after" photos and decided that the two large wooden bowls on the floor of the south wall (the wall with the blue & white turkey platter and other blue & white pieces) need to come out of the kitchen. They make for a sort of black hole in the room. I'll be selling those. I also noticed that the little box on the bottom shelf of the island looks out of place, so I'm moving that, too.

What did I do with the other things you no longer see in the kitchen? Well, the pitcher and creamer collection is now carefully packed and stored. I don't want to part with those (at least for now), but there is no specific place for them, so off to storage for now. The Toby face mugs will be sold. I only found out today that Handsome really doesn't like them. I'm not attached to them, so away they'll go. Same for the majolica pig pitcher I have. Everything else is on its way to Goodwill or one of my sales outlets. Feel free to contact me if you saw something you might like. I promise I'll give you a fair price!

All in all, I think this was a completely worthwhile project. The room looks lighter, more cohesive and it's definitely more clean! If you ask me, I think we did pretty well with this makeover.

Thanks again for all your comments. They really helped! Oh, by the way, click on her blog title here to link over to Anita's blog Bloomin' Workshop and read her post from yesterday. It's Halloween-type spooky that we wrote about darn near the same thing! Right down to the Scandinavian furniture reference! Whew!

I don't want to forget to tell you about my new offering in my Brynwood Boutique! I'd love to know what you think of my sweet Dotty Cat Pincushion!
Click here to visit my Boutique!
JoySignatureBROWNSM